Wednesday, February 29, 2012

Goat WIP

After I completed the donkey, I started to do this guy...and was asked by a few people to do it in pastel. OK...I hit a few bumps in the road since I haven't really worked a lot with pastel. This was my first pastel animal (before the Alaskan Malamute).

I was working on two photos, but not on purpose. My reference was the black and white copy at the top. I realized I needed to go back to my photos and print out a color copy to work with pastels. The photo I chose wasn't a perfect match, but I went with it anyway. (Not to self...delete the reference photos you decide NOT to use...or...don't take so many photographs!)

Basically, blocking in color...but I guess I didn't use a lot of charcoal in the beginning of this one.


Here's a close up.


Adding more to the nose and face...note the lavendar/purple?


Working on the head and fur a little bit....and background still hasn't been started! (There should be warning sounds here...) 


Because, what was a I thinking? I wanted to add a little more color to the background, I guess, but it wasn't working. I should have stayed with the photo reference, but being used to close ups and values with charcoal, backgrounds could be abstract. That's what I was going for, but my attempt to add color didn't work at first. The goat started to recede and not pop out as much.

(*Cringe...*)
Starting to blend the background. There are certain colors that will be banned from my pastels...Olive green is one of them...

I decided to stop here for a while and even signed it, thinking that it would grow on me and that maybe, it was the goat that I wasn't fond of. Maybe it was the subject matter after all...


Except it wasn't. I like goats. I think they're cute, so...

After I finished the malamute and went to the pastel class, I thought that maybe I overworked the goat. That I blended too much.

Part of what I love most about pastels is the texture that you can SEE. Some pastel artists do blend and create beautiful paintings. I love them! But...I want to go another way. I want to see the strokes of the pastel stick. To figure out when the artist used the flat end of the pastel or sharpened the end of it like a pencil. That's the beauty of pastel to me.

So I worked on the goat a little more...and added some warmth to him and the background.


I'm getting there.

Saturday, February 25, 2012

Pastel Workshop

I went to a pastel workshop this morning taught by local pastel artist Bill Gramley. I was so excited, not only because of my recent fascination with the medium, but also because I realized this was the same artist of whom I previously purchased 3 mini paintings!


There is another class on March 31st at Fine Art Carolina Gallery in Mebane if anyone is interested.

Bill demonstrated 3 themes: pears,


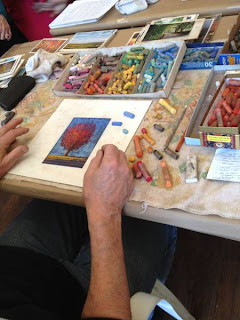
an autumn tree,


and a seascape.


It was amazing to see the paintings appear so quickly. After each demonstration, we were left to do our own version, either from a photo or our imaginations. Here are my versions...I need to provide better photos once I take them out of the "class provided frames" (except for the seascape, that's my own frame).

The pear... (I don't eat pears, so I struggled with this!)


Autumn tree...I wanted to do a horizontal image, but didn't realize the mat would cut off so much on the top...a new photo to come soon...


Seascape....I'm not worried that the photo is blurry and too reflective for you to figure out the highlights on the clouds are wrong...(did I just say that out loud?). No worries...it will be corrected.


The class was very inspirational and made me realize that maybe I can do some landscapes/seascapes, etc...

Stay tuned for an update to the alpine goat...and a new pastel painting of an East African animal. Here's a hint...


Thursday, February 23, 2012

New Pastel Painting: Alaskan Malamute

So the original post disappeared shortly after it was highlighted on another webpage. Sorry it's taken a few weeks for me to get the energy to piece it back together. (Very strange and since I don't know WHY it happened, or even know HOW to find out why, I'm just going to add the photos back and go from there).

The beginning didn't start out the way I wanted and I quickly discovered that my sketch wasn't right. I remedied that by covering the entire panel in charcoal and then bringing out the lighter pieces with a kneaded eraser. At this stage, it's pretty loose and messy looking.

Beginning stage using vine charcoal and a kneaded eraser

Now I'm adding more detail now that I'm satisfied with the placement, but still using just charcoal and eraser. (There might be a little bit of pastel on the right ear).


Refining the detail

It becomes more obvious that I'm adding color now, mainly a soft blue - both to the background and to the fur.

Next step, adding pastels over the charcoal

Adding a second color, mostly a peach color to the fur, to play with the warm and cool sections. Blurring your eyes on the photo helps pick out different colors. I also take a piece of paper with a hole in it and hold it over the photo to identify colors. It's amazing what you see there that your eye didn't pick up before.


Adding peach

Getting into the nitty-gritty of the painting, playing with the colors and adding more local color to the nose and eyes.

Playing with the peach and blue. Also added some pink to the nose and orange to the eyes.

Is this like watching paint dry? I can't help but take tons of photos. I'm adding more black, darkening sections of the fur. I've also refined the nose a little more.

Darkening the fur and softening the nose

The final step...you can see that I've softened the fur a little. One of my favorite spots is under his chin. It's really soft there, almost as if he's shedding and you can gently pull the hair right out. (Does anyone else love to do that? I could do that to these long-haired dogs for HOURS!)

"Wooly Malamute" | 16x20 | pastel