Showing posts with label studio. Show all posts

Monday, April 2, 2012

The Search for Art Festival Supplies: Part I

A few weeks ago I went supply shopping for art shows and festivals.  I already had three tall, narrow panels I created out of slatted closet shelves. They were a deal, and I needed something ASAP last October. They worked fine, but were 8 feet tall and cumbersome to move.

Here's a photo of me standing in front of the panels.


See that behemoth panel in the background on the left? Yep, that's what I used...


...and the wind loved them...

If it weren't for the several good Samaritans at the tour to catch the display, many of my pieces would have ended up on the concrete.

My goal has been to purchase pro panels, but they are still cost prohibitive for me to get an entire set for a 10x10 display area. A fellow artist had black grid panels that created a nice display for her paintings. I went to the surplus store where she purchased her display and was instantly in heaven.

Did I mention I'm obsessed with supplies?

I stepped foot in a surplus store for used store fixtures. I'm a total geek for stuff like this, and even though I have no need for 99.9% of the items there, I still spent at least 3 hours salivating over them.

Here are some of the items I liked.

Check this one out...it's a metal pedestal thing with adjustable feet. Would be perfect for pottery displays! I think it was $8.


OK, so naturally there would be several mannequins in a surplus store fixture place...too bad I don't sew, crochet, or...anything else this little guy could be used for.


Slat walls are always useful, but I suppose they would be too heavy. Great for the garage or studio though.


Metal frames for signs...this would be great to add a great logo or...something like that...I don't know...there's potential there.


Ahh...a white grid panel. Once I saw this one, I knew I was going to get the panels in white instead of black. Just a personal preference there. The black works too, but maybe I'm a visual person and since the white one was on display, I fell for it.


So here they are in my studio, already being all purposeful with my paintings hanging. They're all helter- skelter here with no order, but order and neatness is not the purpose in this photo. I purchased 2 white grid panels because they only had 2. They had plenty of black ones. I'm planning my next trip soon...
 

I almost forgot...check out these ladders! I suppose they could be for a library or kitchen with tall ceilings...or they could really come in handy for a not-so-tall-person. Hmmm...


Tuesday, February 14, 2012

Art Supply Addiction: Flat Files

Hi, my name is Janae, and I'm an art supply addict.

By supply, please don't just think of pencils, papers, brushes, paint. Feel free to include drafting tables, bookcases and my favorite...FLAT FILES! I have such an obsession with these, that I decided to do a whole post dedicated to them. Maybe I'll write a series of posts...because each one has a special place in my heart...

It doesn't really matter that I have a 29 1/2" x 40 1/2" black metal flat file with 5 drawers,


or a behemoth 36x45 1/2" wood flat file with 10 drawers.

I love them all. I google flat file images. I browse them on craigslist. I pin them. It doesn't matter that their use is rather limited. They are coveted by artists and the going rate for a 5 drawer flat file around here starts at $150 on craigslist. I'm still addicted.


Maybe one day I can have a coffee table again, and turn a flat file into one like this...
(source: http://www.designsponge.com/2011/05/sneak-peek-jordan-carlson.html)


Or I can put it in a dining room and put really cool wine on top. 


Or I could paint mine black and put craft supplies in it.
(source: http://www.pinkpaislee.com/2011/09/studio-tour-featuring-rebecca-cross/)
 Look how organized this is! She states on her blog that printer trays fit perfectly in them. I had to google that since I was envisioning my canon color printer.


Ahhh...I don't have the guts to do this to my flat file, but this person aged this flat file on purpose, taking a perfectly fine metal flat file and making it rusty. It looks absolutely awesome!
(source: http://anachronisticdecay.blogspot.com/)

 Just check out the wheels!


And of course, let's take a look at Martha's collection...
(source: http://homedesign.marthastewart.com/2012/01/marthas-homekeeping-room.html)

While this isn't your traditional flat file, it does provide good ideas. I could easily build a hutch on top to hold craft paper. I think she was reading my mind...because I was totally searching on craigslist for a heavy duty craft paper cutter. You know...when people come by my studio to buy my art, I'll have to wrap the frames. It could happen...

Again with the organization in the drawers...paint brushes, pencils, etc...
 Magnetic strip on the side...for something...that I haven't thought of yet...oooh...framing gun maybe? I'll just go around the studio with a heavy duty magnet and anything that sticks will have a home.
 Craft paper and tissue paper. Oh, and twine! In case I have to ship my art!
And of course, the bags have to be stored somewhere.

 So, am I the only one that's addicted to flat files?

Sunday, August 7, 2011

Originals AND Prints Available


Yes, prints have been available for a while...but since I recently sold a print from here, I thought I would update my blog with the links to the right. You can order a print, choose your own mat and frame, have it printed on a canvas, or just order cards.

Art Prints


Originals are most likely at the Saxapahaw Artists Gallery. Otherwise, please contact me if you are interested in an original...I take credit cards too!

Art Prints


One other place that you can visit and see my artwork is the Alamance County Studio Tour. I'll post more details separately, but I will have my art at a fellow artist's house October 15-16 2011. Click here for more information.

Wednesday, August 6, 2008

Updates to my Studio


I took a few pictures of my studio today since we've added a few things lately.
Living in North Carolina requires air conditioning, so my husband added a window unit. No need to add central air here! The grass looks brown because we had someone come by and weed-eat, so I need to rake the dead grass away.
I'll also work on the landscaping once the weather cools down. My husband and I are trying to plan out a large patio and pergola between our house and studio, so that's why nothing has been done here...
Oh - and shutters...I need to get shutters...and complete the lattice around the porch.


I've already posted my cabinets, but I thought I'd add them here since it's now "lived in". The sides of the counter top need to be finished and I need to add the hardware.


Notice the flat file? I love this thing...and have been looking for a "cheap" one for about a year. I'm so excited about it! Now I can put my watercolor papers, my class charcoal portraits, mat board, etc in it. Yay!!! (Now I'll just have to figure out where it will go. Maybe I'll have my husband build me a cabinet for it).
(Trim still needs to be added on the bottom). I'm not posting any pictures of the other side...that's too lived in and I still need to organize!

Friday, April 18, 2008

Lights on in the Studio!

Need I say more? There are a few more things that need to be done...and then I'll be able to organize, clean, dust, etc.

Just a picture of the outside - the door will change Monday, exchanging it for a glass door to get more northern light into the studio. Landscaping still needs to be done and as you can tell, this was taken the night before trash day!

---

This is what you see as you open the door. Track lighting for paintings. Cabinets to the left...bookshelves to the right.

---

As you walk in, look left and you see my desk - for my day job. And yes, that's a panel all for my studio. I'm not sure if you can tell, but there are 3 recessed lights above the desk, 2 double switches above the desk and 2 quad switches below the desk. (Did you notice the light switches? There's a quad switch for the lights (1. fluorescents in center of room; 2. fluorescents above the cabinets and shelving; 3. track lighting; 4. outside lights) and then a separate single switch for the recessed lights. This was originally supposed to be a dimmer, and may change to it later.

---

Cabinets - just simple ones ready made from Lowes. There's a timer for the vent above (gotta have that for all sorts of art mediums) and a couple double outlets there. Another light switch behind the books for the fluorescents below the wall cabinets. The table is an antique that we need to get rid of in place of a sturdy drafting type table. I need the space for matting and framing.
---

This is what you see as you look right from the front door. This is the messy area - still working on these finds...something I found on craigslist. I'm painting them white and will have to do something about those cut outs. Notice the fluorescent lights above these units. (Haha, disregard the deflated excercise ball. Not much can be done with 2 small kids. They love it as a toy).

---

The other 2 units - can you tell which one I've primed already? Just in case you guys ever need to vaccuum sheetrock dust - make sure you don't use the light weight shop vacs! Apparently, sheetrock dust is very heavy and will clog the lighter shop vacs in no time. I had to go out and buy the bigger one. Oh - the cut out in the ceiling is the attic access. There are 2 lights up there. ---

So, that's it for now. My kids painted tonight in the studio - it's a good thing the floor isn't real wood. (And let me tell you that even though you may know they're painting, and there's all colors including red, it's still pretty freaky when you see red paint splatter all over the floor...I couldn't help looking for boo-boos).

Sunday, March 16, 2008

Studio Update


White...The walls, ceiling and trim...white. I know, I could have picked all different colors, bold, soft, blue, red, but I chose white.


I've read that a mid-tone gray is the best for a studio, but I love to have things bright, and since my windows are not that large (for more wall space), I want it bright!


The corner here is for my future office, hence the recessed light and lots of outlets (there are more closer to the floor).

Sunday, February 24, 2008

Update on my Studio


We've been working hard at the studio (hahaha...did I just say "we"? OK - my husband has been working hard!)

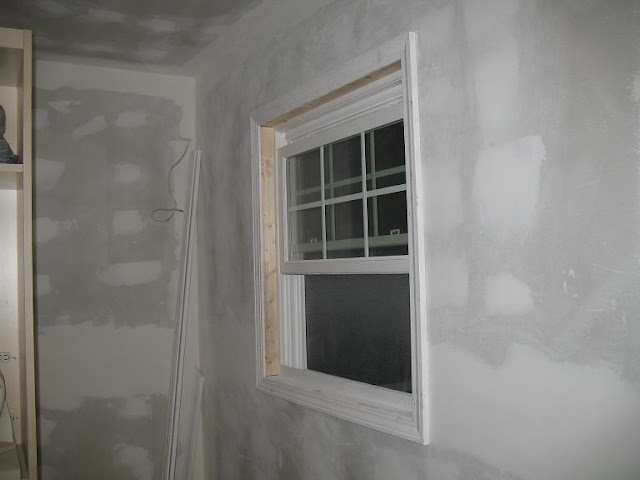
I've lost count on the number of coats/sanding/recoats of sheetrock mud to the walls and ceiling, but it's almost there! The dust from sanding the mud has permeated every nook and cranny of the building. The ceiling still has to be finished, but the trim for the windows went up today. At first I wanted deep windows (oh, I forgot what they're called), but after reading about the different window trims and recommendations, I decided to go with the standard trim since it was a small room.
Painting just may happen this week - You'll be soooo surprised!

Monday, February 4, 2008

It's 53 degrees in the Trashcan

I bought one of these wireless thermometers for my husband for Christmas - it has an outside sensor to let you know what the temperature is at any given moment inside and outside (well, at least wherever the sensors are). My husband recently put the outdoor sensor in my studio to ensure it stays above 50 degrees in there. (It has to stay at least 50 degrees so that the sheetrock mud dries right). I was cleaning up the odds and ends the other night and I put it in the trash. I just thought it was our old sensor (never mind the faint sense of confusion as to why the broken one would have been there in the first place). The revelation did not come to me until later when my husband mentioned the studio temperature as he was looking at the display. I fessed up that the sensor was in the trash. We'll take it out before trash day, but it makes for a few laughs until then.

And yes, it's 53 degrees in the trashcan.

Monday, January 28, 2008

Update on my Studio


My husband has been working hard lately...as soon as he gets home from his labor intensive job, he goes and works on my studio! It's looking really nice - and I'm getting excited! Here are the most recent photos:


I'll post better pictures once the sheetrock is complete and we've had a chance to clear things out of the way.

Thursday, January 17, 2008

First Drawing in the Studio!


The insulation is almost done on my studio! My husband has been busy trying to get it wired and insulated recently. Sometimes he doesn't even come inside after he gets home from work - he just goes straight to my studio to work. I decided to keep him company tonight, so I brought my work in progress out there while he stapled. This is the first of many more pieces of art to be created in my studio!


The cow portrait came came from a reference photo on the WetCanvas site I frequent. I still need to work on it, change the perspective of the fence post and tweak the values a little bit.